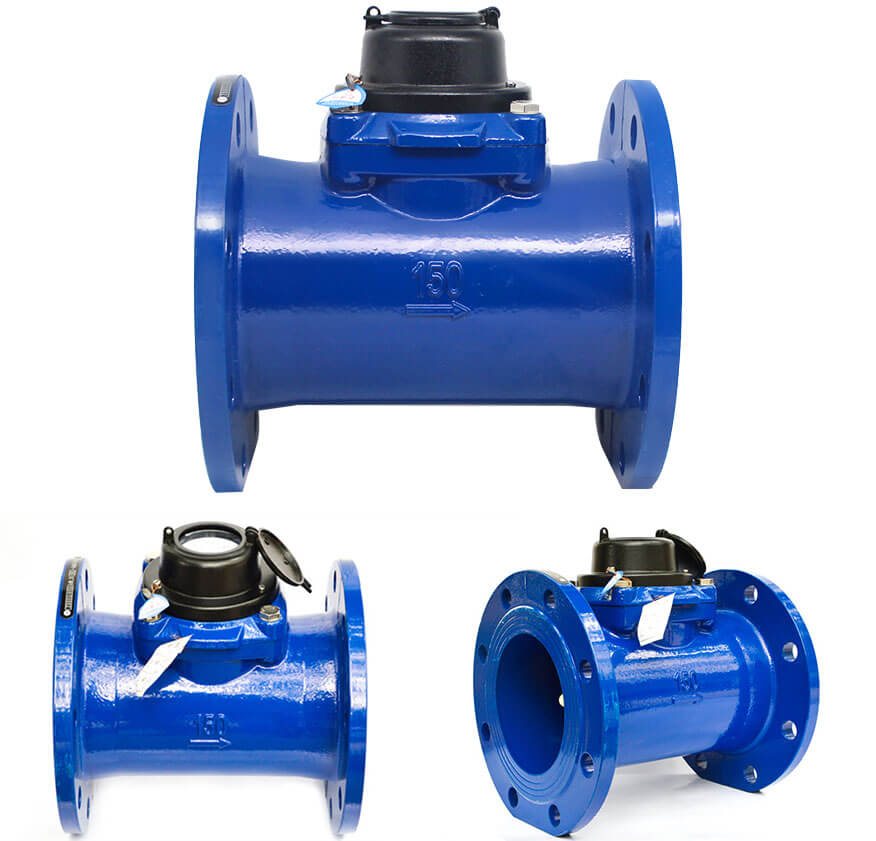

Installation of woltman water meter
Installation and selection
1) The selection of water meter should first consider the working environment of the water meter, such as water temperature, working pressure, working time, measuring range and water quality, and then determine the diameter of the water meter according to the design flow through the water meter, so as to produce the pressure loss of the water meter close to or not exceeding the specified value. In general, when the nominal diameter is not greater than DN50, the rotor type water meter should be used; when the nominal diameter is greater than DN50, the woltman type water meter should be used; when the flow rate of the water meter changes greatly, the compound water meter should be used. Wet water meter should be preferred in interior design.
2) When the water is evenly used, the nominal diameter of the water meter shall be determined according to the design flow rate per second not exceeding the common flow rate of the water meter. When there is fire flow, it is necessary to check the flow to ensure that the total flow does not exceed the maximum flow limit of the water meter.
Installation points
1) The water meter shall be installed in a place convenient for maintenance and reading, free from sun exposure, freezing, pollution and mechanical damage.
2) The front end of the woltman water meter should have a straight pipe of 8 ~ 10 times the nominal diameter of the water meter, and other types of water meters should have a straight pipe of no less than 300 mm.
3) The rotor type water meter and the vertical woltman type water meter should be installed horizontally; the horizontal woltman type and the volumetric type water meter can be installed horizontally, obliquely or vertically according to the actual situation; when installed vertically, the water flow direction must be from bottom to top.
4) For the water supply system integrating life, production and fire fighting, if there is only one inlet pipe, the bypass pipe should be installed around the water meter.
5) The maintenance valve shall be installed on the front and back of the water meter and the bypass pipe, and the water discharge device shall be installed on the water meter and the valve behind the meter. In order to reduce the head loss and ensure the straight flow of water in the pipe in front of the meter, the gate valve should be used for the maintenance valve in front of the meter. The maintenance valve and special water discharge device behind the household water meter in the residence may not be set.
6) The water meter well shall be protected from inundation and rain.
7) The direction of water meter should be consistent with its type.
8) When the water meter may reverse, affect the metering and damage the water meter, a check valve should be set behind the water meter.
9) The installation requirements of cold and hot water meters are basically the same except for different working temperatures. The maximum working temperature of the hot water meter is 90 ℃. If the hot water meter is installed in front of the boiler or heat exchanger, a check valve should be set behind the meter to prevent backflow.
10) There are two ways to install the remote water meter: the installation of the remote water meter which only plays the role of outdoor meter reading is relatively simple, as long as the output system of the water meter is connected with the data display device (repeater) installed outdoors; Another way is to connect all remote water meters of the whole building or the whole community to the community management department through repeaters and network controllers, and manage them through terminal equipment.
Having said so much about the remote water meter installation knowledge, you must have already understood the remote water meter installation in your heart. The remote water meter installation we prepared for you is not for anything else, but for the convenience of your life. Hope you start installation according to our instruction we prepared for you, it may reduce error in your installation.